


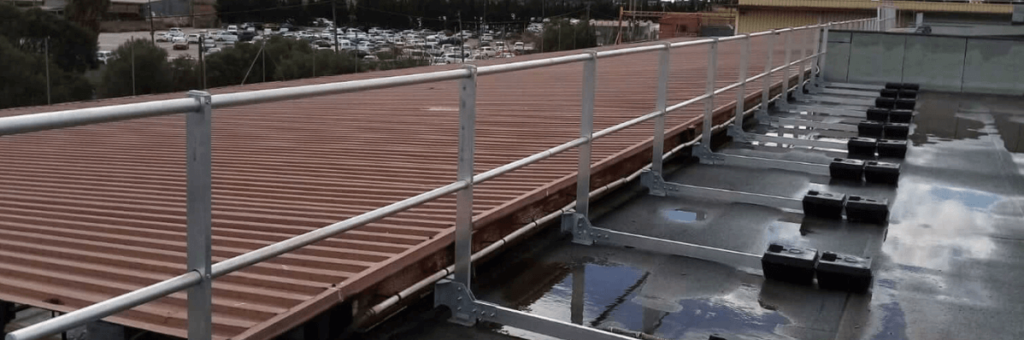
This week we are going to focus on installing counterweighted collective protection guardrails.
As we have mentioned before, choosing a system that fits our needs based on the risks to be protected is just as important as a correct installation.
That is why today we will look, in general terms, at how to install counterweighted safety guardrails.
Before Installing a Counterweighted Guardrail
Once the appropriate safety systems have been selected for each case, we will study the area to be protected so that we can lay out all our needs on a plan.
Afterward, on that plan we will find all the necessary information about the elements we will need for our installation.
When requesting our counterweighted guardrail systems from the manufacturer or partner, we will need to give them details on a number of important points so that a proper installation can be carried out.
The information we are referring to is the following:
- Number of linear meters required.
- Turns that will have to be made in the installation to get around corners of any angle, so that manufacturers or partners can supply the number of corners required to make them.
- Start and end sections of the guardrail, so that the plastic caps that protect against possible cuts from the handrail profiles and intermediate tubes can be supplied.
- Based on the manufacturers’ instructions, we would also need to know the sections where the guardrail loses continuity, so that the appropriate number of counterweights can be added.
With this information, we would have everything needed to order our systems.
Steps to Install a Counterweighted Guardrail
Laying Out the Materials
Once the materials have been received, we will proceed to lay them out on the roof.
The first step is to be clear on what the manufacturer specifies regarding the maximum distance between posts; this measurement is what will define the layout of the materials.
Once this is known, we will join the vertical and horizontal posts through the mounting base. With these profiles joined, we will distribute them along the installation.
Laying Out the Counterweights

With the posts distributed and placed at the distance indicated by the manufacturer, we will proceed to lay out the counterweights; each manufacturer will specify how many of these elements must be placed on each horizontal post.
There are usually two solutions on the market: some opt for two 12.5 kg weights each, and others for a single 25 kg counterweight. This amount of weight is what the regulations specify for the system to be safe against overturning and wind.
Handrail and Intermediate Tubes
We will now continue with the installation of the handrail and intermediate tubes. These profiles are fed through the vertical posts, and with them, thanks to the corner pieces, we can handle any turns we may encounter on the different roofs or areas to be protected by this type of system.
Fit All the Protective Plastic Parts
Once these steps are done and we have checked that everything is correct, we will proceed to fit all the plastic parts that protect against cuts from the profiles. These elements are caps for the vertical and horizontal posts, end caps for the guardrail handrails and intermediate tubes, and so on.
Secure the Entire System
With all the components in place, we will finally secure the entire safety system with the hardware specified by the manufacturers for each element. In this regard, it is important to be clear on the correct tightening torque for the fasteners, since otherwise we could strip the threads of the hardware, resulting in insufficient fastening.
Tips for Installing a Counterweighted Guardrail
Special attention must be paid to the joining of the following elements to make sure that the collective protection guardrails are properly secured and will perform their function:
- Fastening the top cap of the vertical post to the handrail profile and to the post itself.
- Fastening the vertical post to the intermediate tube profile.
- Fastening the vertical post to the guardrail base.
- Fastening the horizontal post to the guardrail base.
- Fastening the tongue-and-groove joint of the handrail and intermediate profiles.
- Fastening the counterweights to the horizontal post.
- Fastening the corner pieces to the handrail and intermediate profiles.
For the remaining caps and covers, most manufacturers design elements that are fastened by simple pressure.
With all these steps, we would have our systems correctly installed and meeting the necessary safety conditions.
Finally, we will always refer to the manuals, technical data sheets, and other documents provided by the manufacturers of these safety systems to verify how to carry out the installations. In them we will find all the information needed for the correct installation of their products.