


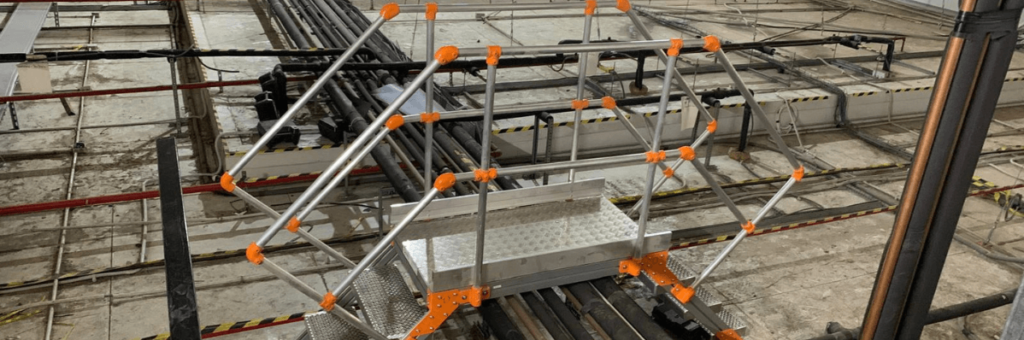
In the following post, we will focus on how to install crossovers. We have previously discussed their functions and which components make up these safety systems.
Manufacturer’s Instructions
The first thing to keep in mind is that crossovers are installed according to each manufacturer’s specific instructions. Therefore, when we purchase one of these systems, it is important to consult the manuals and technical data sheets for each one; these documents contain all the information needed to carry out an installation suited to each type of system.
However, there are aspects of installing crossovers that are common to all manufacturers.
First, we have to properly choose which type of system our roof or installation area requires. For this, we have two alternatives:
- Crossovers fixed to the surface itself
In cases where these safety elements can be fastened directly to the roof itself.
- Counterweighted crossovers
For roofs that cannot be drilled, or in cases where the crossovers will be used only occasionally.
Starting from this information, and once we have chosen the system that suits our roof or installation area, we will go over the installation methods and their specifications depending on the type of crossover chosen.
Direct Installation on the Surface
In our case, once assembled, the crossovers include angle brackets at the ends of the stringers that form the steps. These elements make up the foot that allows the system to be fastened to the surface through holes drilled in the brackets, which serve as a guide for fastening the system.
The type of anchor we use will depend on the type of surface we have.

Installing Crossovers on Concrete Surfaces
For this type of roof, there is a variety of anchors on the market that we could use to fasten these safety systems, such as mechanical anchors, direct-to-concrete screws, and many others, from which we will have to choose the type best suited to the concrete we need to drill. In some cases we will have to drill the concrete first and then install the anchor.
Installing Crossovers on Single or Trapezoidal Metal Sheet and Sandwich Panel Surfaces
On this type of surface, we can fasten with rivets or through a load-spreading plate that is fastened to the roof beforehand, and then we fasten our system to it with rivets. This allows us to bridge level differences on this type of roof caused by the waviness of their surfaces, depending on where the crossover itself needs to rest.
Another type of hardware we can use on sandwich panels is self-drilling screws, but, as we mentioned earlier, we will be guided by the manufacturers’ technical specifications.
For the rest of the roofs, likewise, we will review the recommendations on the types of anchors that can be used.
A very important aspect of this type of roof fastening is to ensure the roof is waterproofed again after the crossovers are installed, which we do by using sealing gaskets or special products that guarantee the roof’s waterproofing once it has been drilled for the installation.
Installing Crossovers Using Counterweights
In our case, the fabrication method for situations in which these safety systems are installed with counterweights is exactly the same as when they are fastened directly to the surface, using the brackets mentioned above. The only difference is that the brackets are fastened directly to a counterweight with anchoring elements suited to each counterweight material, since they can be made of concrete, plastic-coated concrete, and other variants that will require a specific type of anchor.
Once the crossovers are fastened to the counterweights in question, they are placed in the required areas to perform the intended function of these systems.
Assembling Crossovers
Aside from the fastenings depending on the type of system and surface, we have to consider that, depending on the dimensions of the system being manufactured, it may be delivered fully assembled or, alternatively, disassembled.
As we noted in previous posts, the parts that make them up are:
- Walkway.
- Stringers with steps.
- Protective guardrail in cases where these systems require it, such as heights above 500mm, distances of less than 120mm to danger zones, etc.
The assembly of these parts will be specified in the manufacturers’ installation manuals, where we will find all the information needed to ensure a correct installation.
Generally, these elements are joined to each other using connection fittings in the case of the guardrails, and special fastening hardware to join the guardrails to the walkway profiles and the stringers. The steps, for their part, are joined to the stringers with hardware included in the manufacturing itself.
At Ypsos Safety, we make this task easier by numbering the profiles, thus helping installation companies easily locate the elements that must be joined together.
It is also worth noting that, to ensure a correct installation of these systems and that their protective function is assured, installation companies receive training from the manufacturers to get to know the product better and to certify them as an installation company. Any variation in the systems or in how they are installed will lead to an expansion of that training in order to ensure a correct installation of crossovers.